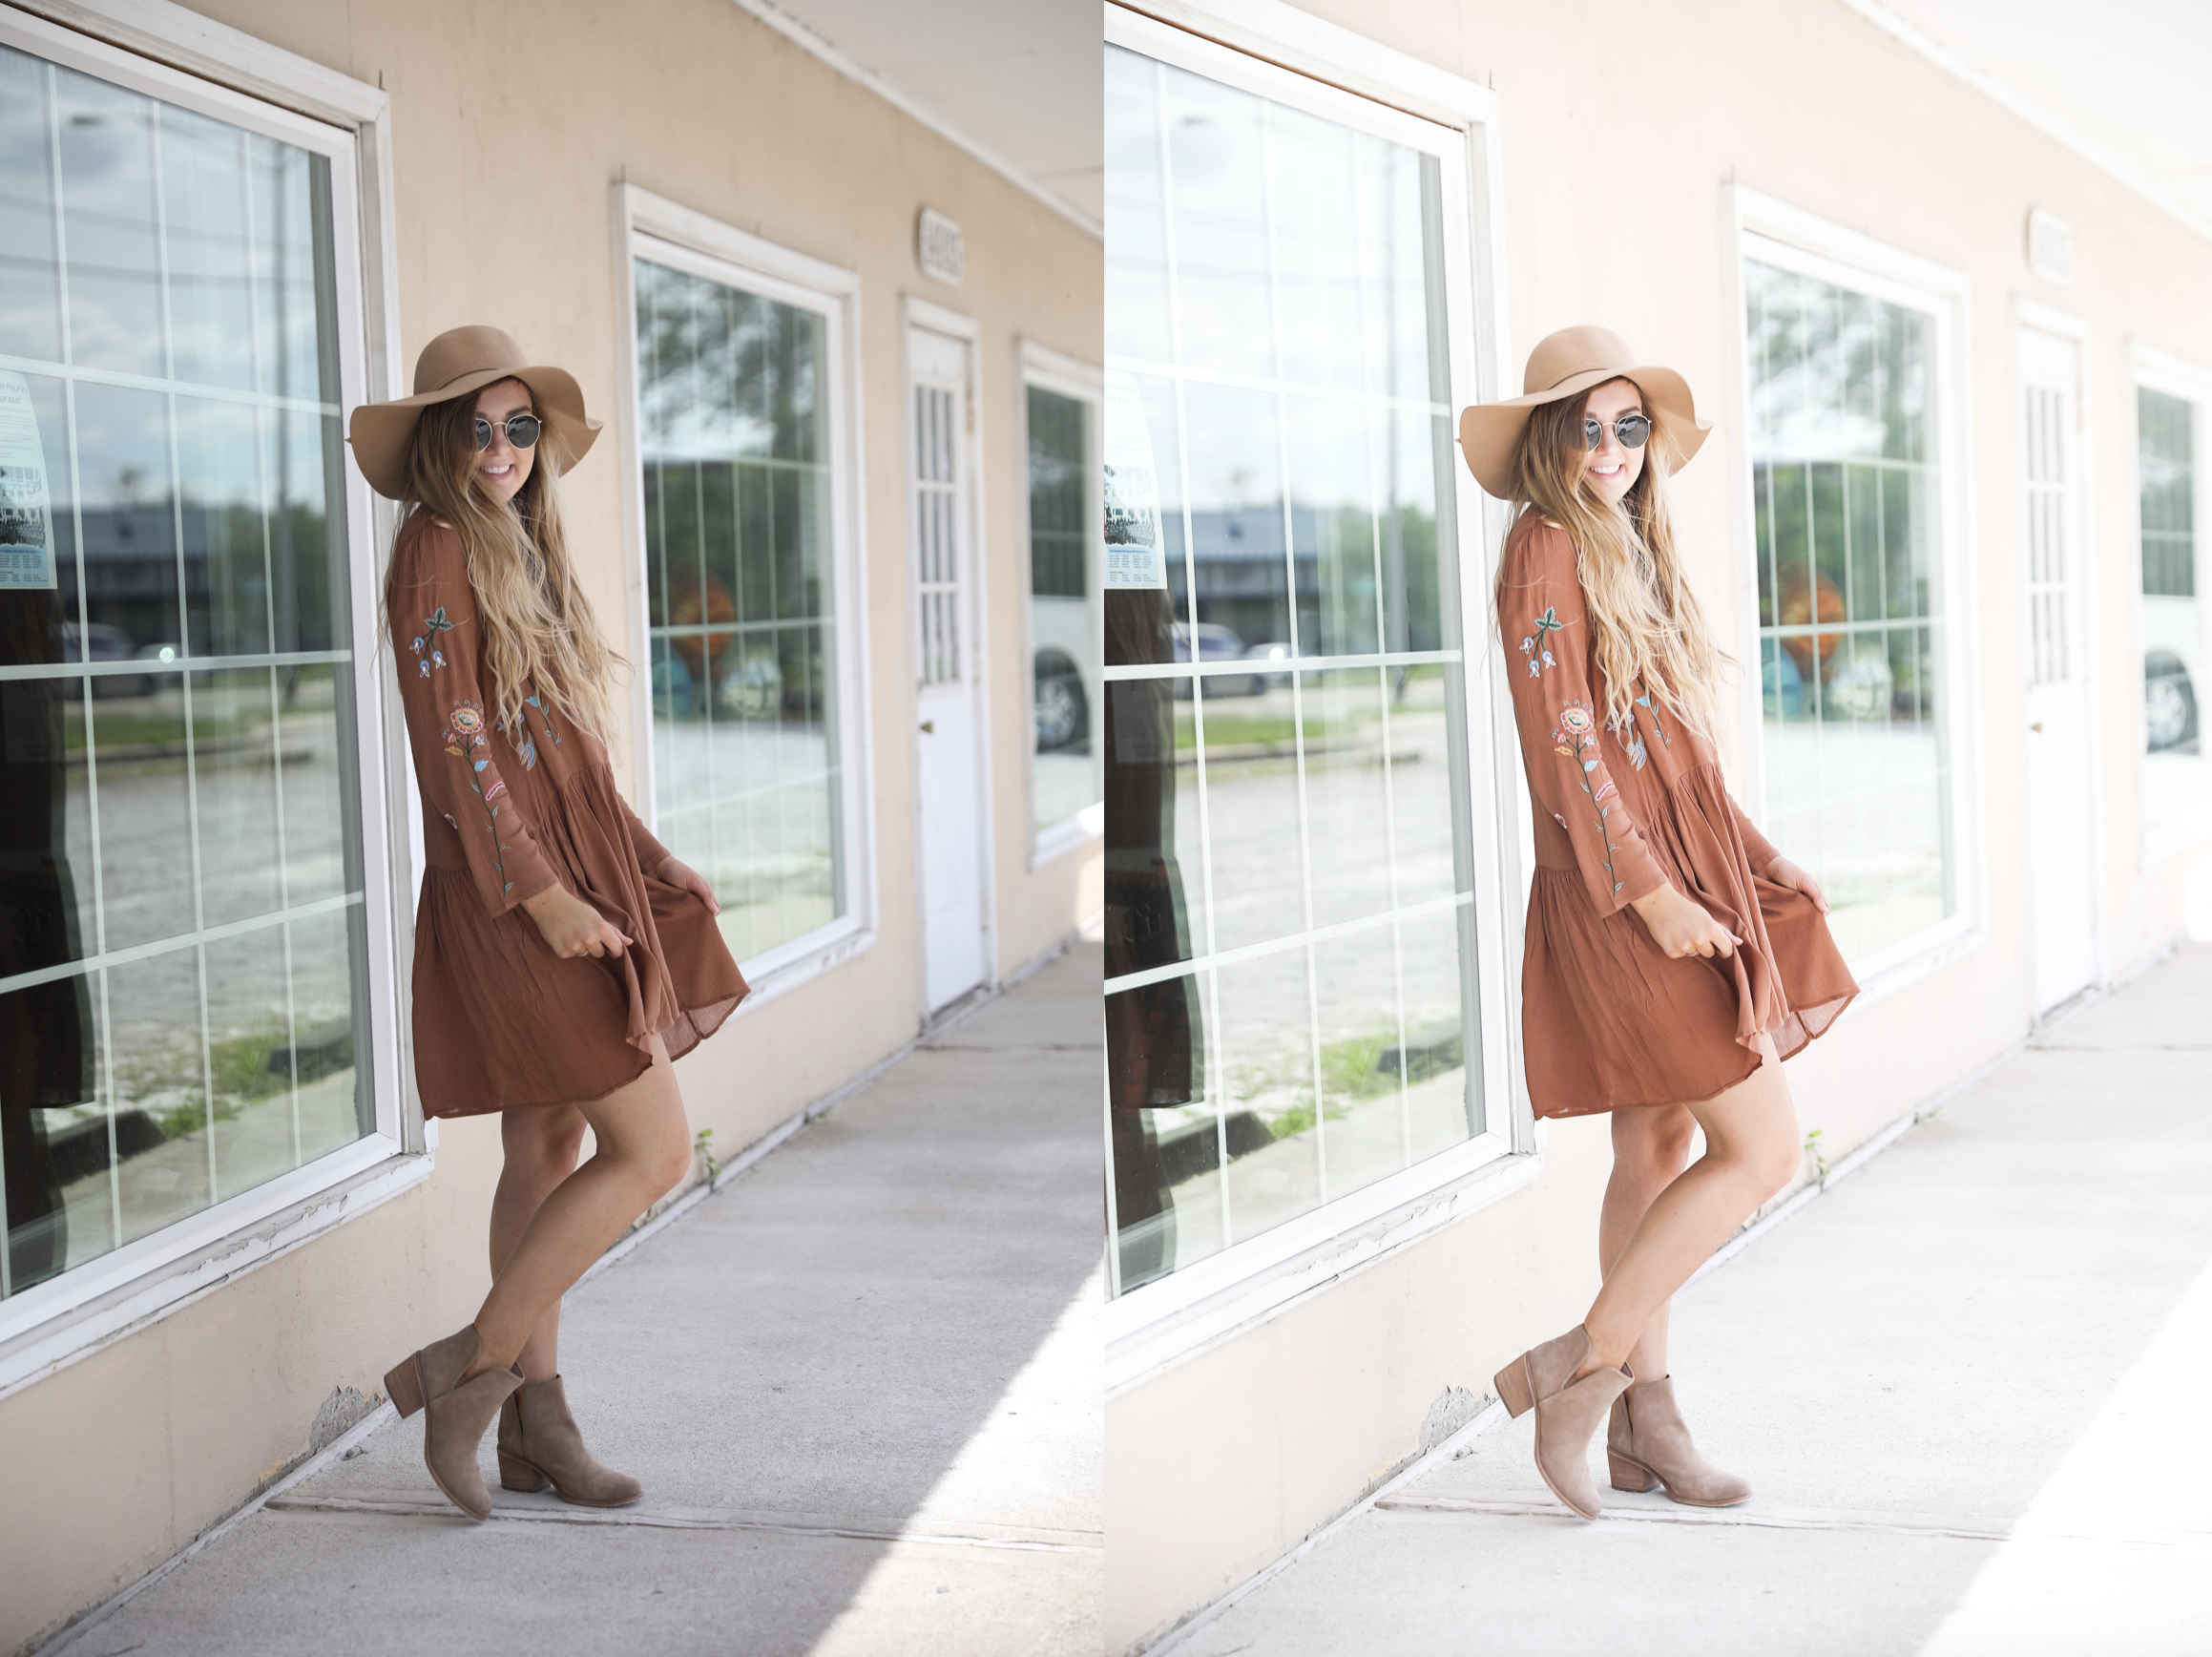
Hey y’all! Today I am bringing you one of my most requested posts, how I edit my blog photos! I in no way think I am a professional, and I still have a lot to learn and improve on. However, I have had my blog for about three years and I have come a long way so I hope this helps you! I want to point out that a lot of fashion bloggers, like myself, use unique ways to edit. I brighten the background of my photos and overall keep the whole thing pretty bright. This is so that all my photos look similar! There are thousands of ways to edit and this is just my personal way. I encourage anyone learning how to edit to try their own thing and make their photos look unique!
Last week I did a post on how I edit photos on my phone to match my blog pictures so you can check out that post here How I Edit Blog and Instagram Photos on My Phone | BLOG SERIES to see more on that! I learned how to take photos by watching hundreds of YouTube videos and practicing. When I have someone take my photos I usually take a few test shots of them to make sure I like the settings then I give them the camera! The more you practice, the better you’ll get and the more you will learn! If you want a post on camera basics and what settings I use to take my photos let me know, but a brief explanation is I set my aperture as low as it goes (this creates a blurred background) and I zoom in all the way! You can also learn more about what camera equipment I use from this post What Camera I use | What’s In My Camera Bag Blogger Edition.
Here is the video, but I also included screenshots below for those of you who would rather learn like that! I filmed the actual editing the night before I did the voice over (don’t ask me why…I probably should have done both at the same time haha) so hopefully it makes sense! Also sorry I sound sleepy 🙂
*Note you may need to zoom to see some of the photos details
First up, Lightroom
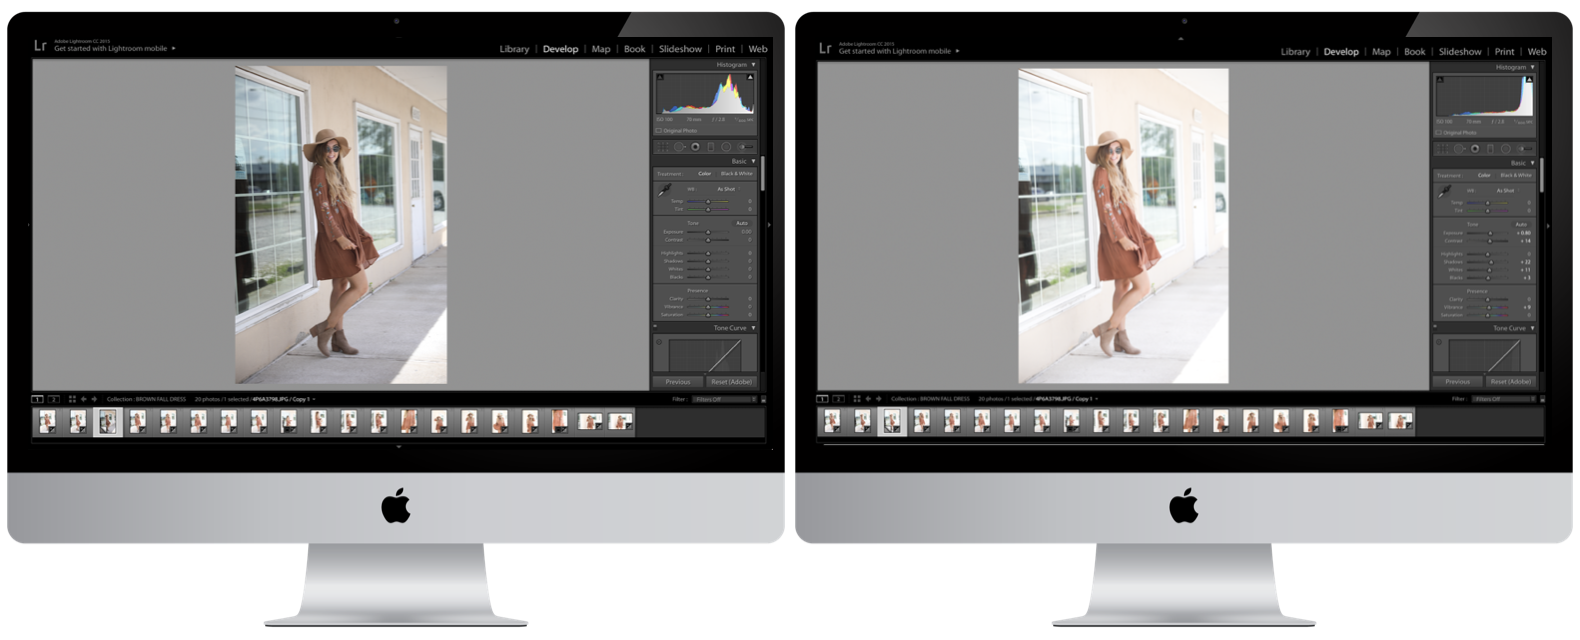
First thing I do is open up Adobe Lightroom. This app is my FAVORITE editing app I have ever tried! I think it is pretty easy to get the hang of! I do want to add, usually I am editing around twenty photos at a time, but today I am just showing you one!
How I Edit in Lightroom
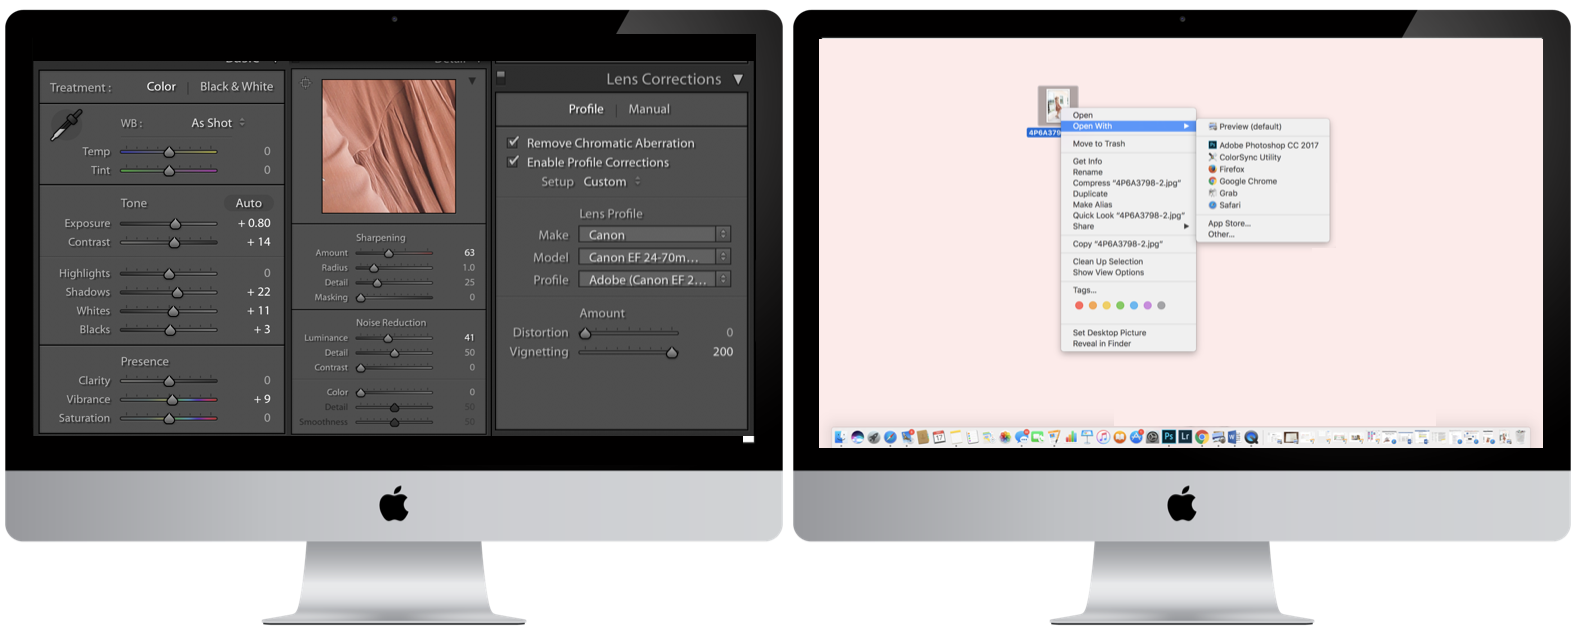
The main things I edit in Lightroom are:
– Exposure. I like to keep my photos bright! It depends on the actual photo how bright I have to get it.
– Contrast. I usually just up the contrast a little bit to add some definition.
– Shadows. Again, editing completely depends on what the original photo looks like. But usually I just bump this up a little!
– Whites. I add a little bit of this feature to make the whites pop a little more!
–Blacks. This is sort of like contact, it adds a little dimension.
– Vibrance or Saturation. Depending on the photo I may mess with this a bit!
– Sharpening. I make the photo about 50% sharper.
– Noise Reduction. I also move this up about 50% to make it smooth.
– Lens Correction. This is something my older sister taught me after she took an editing class! I check the “Remove Chromatic Aberration” and “Enable Profile Corrections” then go down and choose my lens. I also put the distortion at 0 and vignetting at 200 since I have a full-frame camera.
– I totally forgot to show how I brighten the background a little extra so to see that make sure to watch my video!
Then I export the photo(s)!
Next I Open the Photo(s) in Photoshop
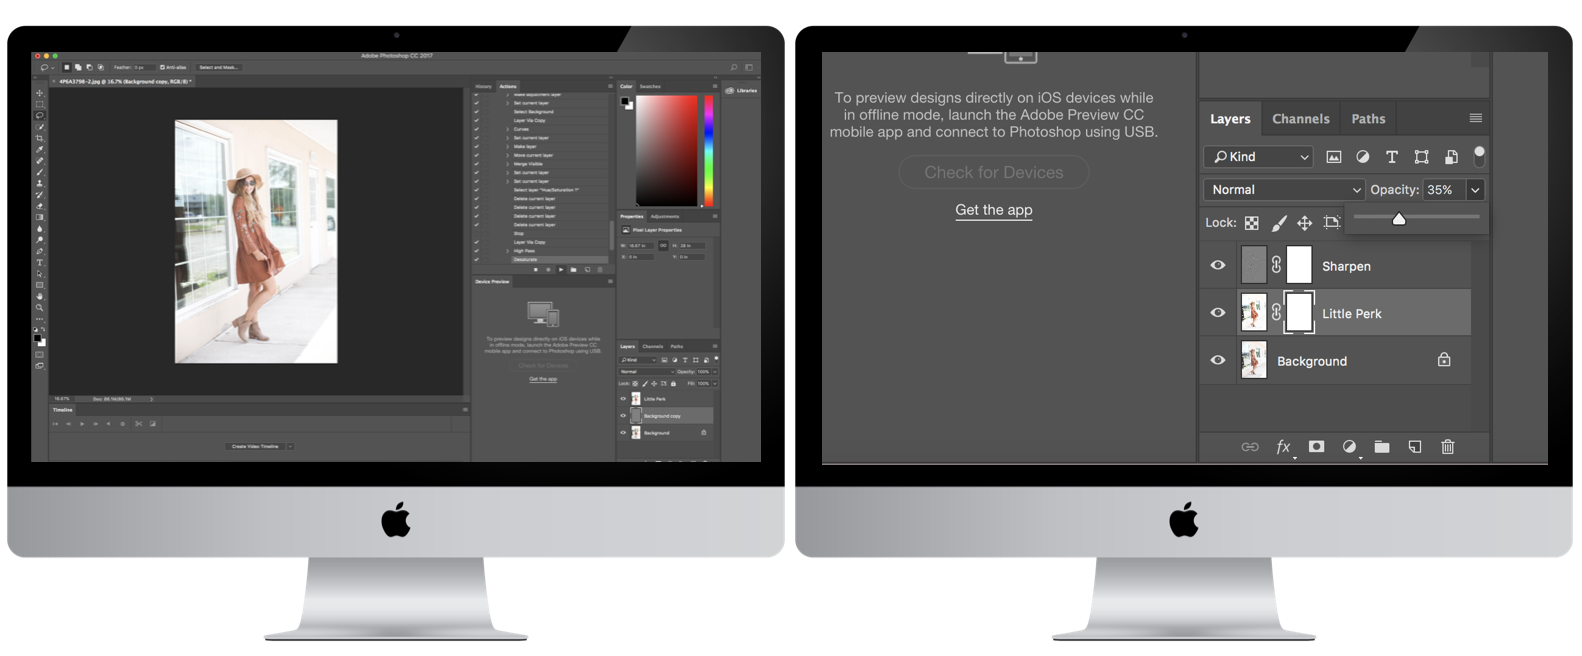
A lot of bloggers put a “filter” over their photos to get them to all look similar. You can do this through Lightroom or Photoshop, but mine is a photoshop Action! You can purchase these online (I love to look on Etsy) or you can find free ones to download! After I put the action on the photo I mess with the opacity until I am happy. Then I export!
Resizing Photos
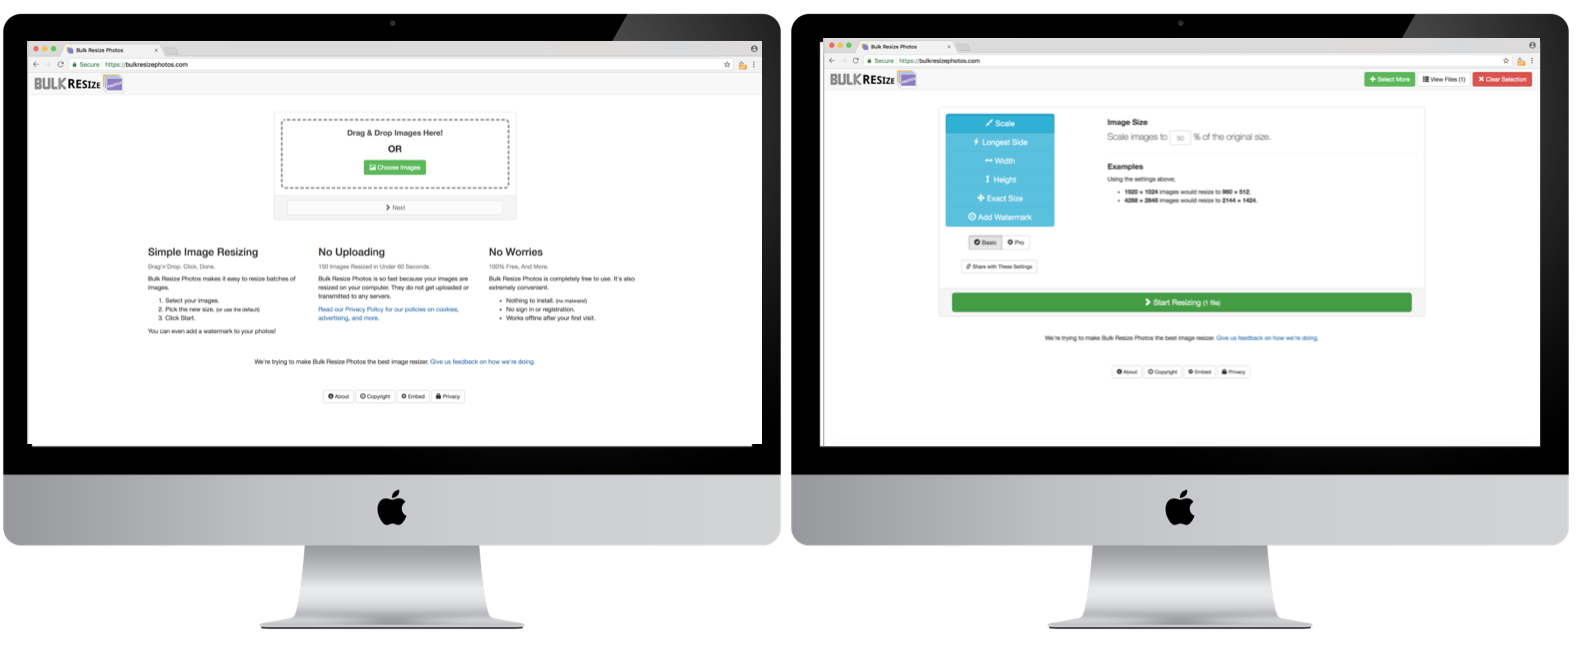
Next I resize my photos. I have found that the easiest way to do this is to go to a site called Bulk Resize Photos, but you can also do this on photoshop. I will note that it doesn’t work on Safari so you have to Chrome or another browser! However, I love this site because you can easily resize all your photos at once!
Rename the Photos
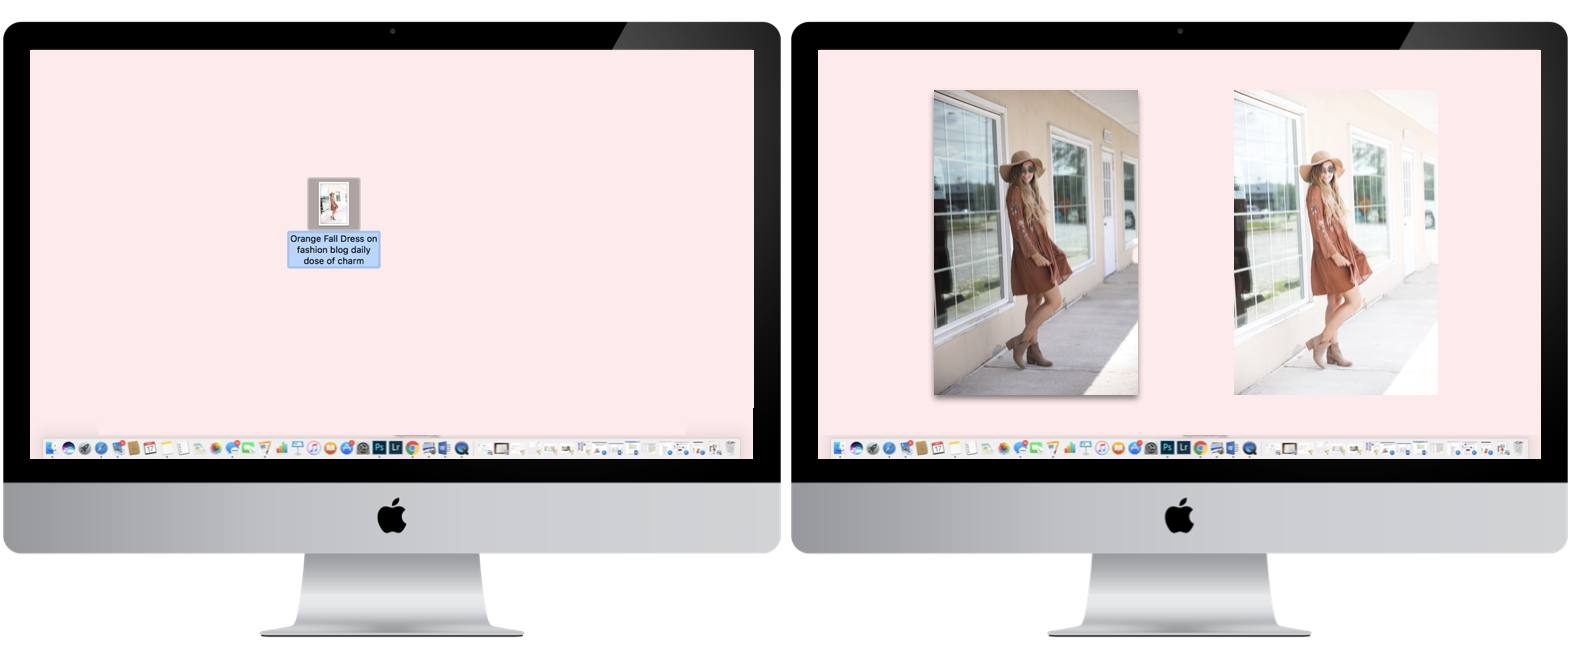
Lastly, I rename the re-sized photos. I usually use key words about the photo and add in “daily dose of charm” and “lauren lindmark” too! This helps with SEO (search engine optimization)!
And that’s all I do! Like I said above, the video is more descriptive so if you are confused watch that. You can also leave any questions below!
xoxo,
Lauren Emily Lindmark
Copyright © 2017 dailydoseofcharm.com
![]()

This post is awesome! But I NEED to know where that dress is from OMG *heart eyes*
ah thanks for sharing- this was seriously so helpful!
Aw of course! Thanks Summer!
I really have to improve my game when it comes to that and reading your tips really help, thanks for sharing!
Lucie, xx
Aw yay I am glad it helped!!
I had to re-visit this one as it was gone the other day! Love your editing process —your photos are beautiful-Katelyn/www.theyellowspectacles.com
Yeah I don’t know what happened, technology is a pain haha! Thanks girl 🙂
This is such a lovely read. I’ve always wanted to learn Lightroom. Thanks for sharing this. Have to teach myself soon.
Jessica | notjessfashion.com
Thanks girl!
Such a great post! I mostly take pictures in RAW format and edit on Photoshop but I am trying to learn LightRoom too!
Thanks Alexa! I really need to learn more about RAW photo editing and editing on Photoshop, but it seems like such a jump! You should totally do a “How I Edit My Blog Photos” post so I can see yours 🙂